EN
EN

Why Lab Table Placement Determines Laboratory Safety
A school science laboratory equipped with the highest quality lab tables can still be an unsafe environment if those tables are positioned without consideration for movement, visibility, and emergency response. The layout of a laboratory is not an aesthetic decision. It is a safety system that must function correctly during routine class activities and, more critically, during the first thirty seconds of an emergency when students and teachers need clear paths to exits, eyewash stations, and fire suppression equipment. A poorly placed lab table creates blind spots for teacher supervision. A tightly packed row of lab tables blocks evacuation routes. An unanchored lab table becomes a hazard during an earthquake or when a student stumbles against it during a chemical spill incident. Laboratory layout design for educational settings requires balancing three competing objectives: maximizing student capacity within available floor area, maintaining adequate clearance for safe movement and equipment access, and ensuring teacher visibility across all student workstations.
Choosing Between Fixed and Mobile Lab Table Configurations
The first layout decision for any school laboratory is whether lab tables should be permanently installed or mobile. Floor mounted installation anchors each lab table to the building structure, providing absolute stability for experiments involving glassware, hot plates, and reactive chemicals. This configuration is standard for chemistry and advanced biology laboratories where even minor table movement during an experiment could trigger a hazardous incident. Floor mounted lab tables also allow for integrated utility connections including gas, water, and electrical services that are routed through the building infrastructure rather than surface mounted cables and hoses that create trip hazards. Mobile lab tables equipped with lockable casters offer flexibility that serves multi purpose science classrooms where a single room hosts biology, chemistry, and physics classes across different periods. The mobility enables teachers to reconfigure the room from lecture orientation to group experiment clusters within minutes. However, mobile lab tables require disciplined locking protocols. Every caster must be locked before any experiment involving open flames, corrosive chemicals, or heated equipment begins, and teachers must verify locked status as part of the pre experiment safety checklist. The decision between fixed and mobile should be made room by room based on the specific curriculum activities, not applied uniformly across an entire science department.
Clearance Spacing and Traffic Flow Dimensions
International laboratory safety guidelines consistently recommend minimum clearance dimensions that translate directly into lab table placement decisions. Between rows of back to back lab tables where students work facing away from each other, a minimum aisle width of 1200 millimeters is recommended to allow two students to pass simultaneously without contact and to accommodate emergency egress during an evacuation. Between a lab table and an adjacent wall or fixed equipment, a clearance of at least 900 millimeters ensures that a student can work seated at the table while another person passes behind without disruption. Around fume hoods, emergency showers, eyewash stations, and fire extinguishers, a clearance radius of 1000 millimeters should be maintained free of any lab table or storage unit to guarantee unobstructed access during an emergency. These dimensions are minimums, not targets. Schools with above average class sizes or students with mobility accommodations should increase all clearances proportionally. A standard lab table measuring 1200 millimeters by 600 millimeters, when arranged in island configurations with four students per table, occupies approximately 1.5 to 2.0 square meters of effective floor area when circulation space is included. This ratio of workstation area to circulation area should be calculated during the layout planning phase and compared against the room's total usable floor area to verify that the proposed layout does not exceed safe occupancy density.
Layout Typologies Island Peninsula and Wall Mounted Arrangements
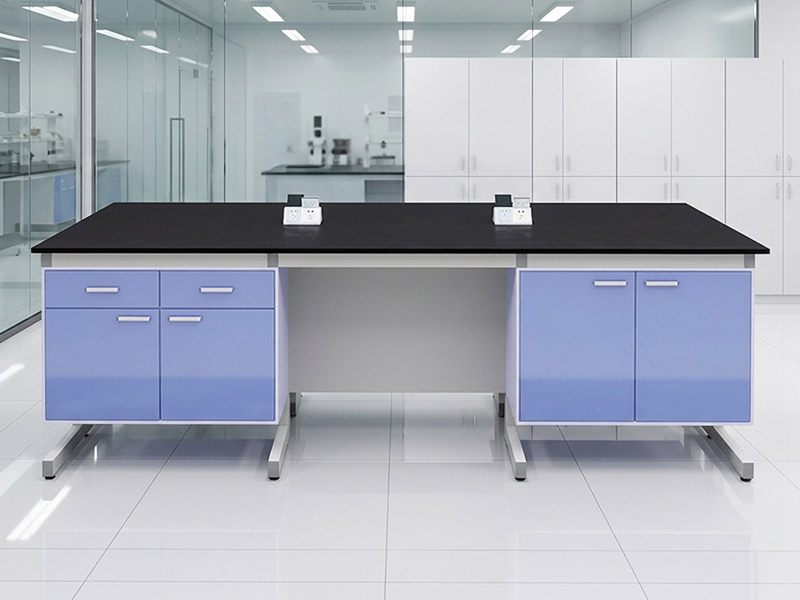
Three primary layout typologies serve most school laboratory requirements, each with distinct safety and pedagogical implications. The island layout positions lab tables as freestanding units in the center of the laboratory, with students working on all four sides. This configuration maximizes teacher visibility because the instructor can circulate completely around each table and observe every student's experiment from multiple angles. Island layouts work best for chemistry and biology laboratories where hands on experiments require close supervision. The peninsula layout extends lab tables perpendicularly from a wall, creating three sided access with one side anchored. This arrangement is efficient for linear laboratories where utility connections run along the perimeter wall, and it naturally creates defined work zones that reduce cross traffic between adjacent student groups. Peninsula layouts are well suited to physics and electronics laboratories where wall mounted power outlets and data connections serve each workstation. Wall mounted lab tables run parallel to the laboratory wall with students working on one side only, facing the wall. This layout is the least desirable for supervised experiments because the teacher cannot see what students are doing from behind, but it remains practical for computer based science work, microscopy stations, and equipment alcoves where direct teacher supervision is supplemented by digital monitoring. Most well designed school laboratories combine two or more layout typologies within a single room, using island tables for the primary experiment zone and wall mounted or peninsula tables for specialized equipment stations.
Integrating Safety Equipment and Storage into the Lab Table Layout
A lab table layout that looks efficient on paper can become dangerously cluttered in practice if storage and safety equipment are not integrated into the spatial plan. Storage cabinets integrated directly into the lab table frame keep frequently used reagents and glassware at the workstation without consuming additional floor area for separate storage units. This reduces the distance students must carry chemicals across the laboratory, which is one of the most common causes of in transit spills. However, integrated storage must be balanced against the need to keep certain chemical categories separated. Flammable solvents should not be stored in the same cabinet cluster as oxidizing agents, even if both cabinets are within the same lab table assembly. The layout plan should designate which lab tables store which categories of materials and ensure that incompatible chemicals are stored in physically separated table assemblies. Emergency equipment positioning should be mapped during the layout phase, not retrofitted after tables are installed. Eyewash stations should be within ten seconds walking distance of every lab table, measured along the actual circulation path rather than as a straight line distance. Fire blankets and extinguishers should be mounted on walls adjacent to but not directly above lab tables where they would be inaccessible if the table itself is the source of a fire.
Practical Design Scenario Applying Layout Principles to a Multi Use Science Laboratory
A secondary school in an urban district is renovating a 90 square meter science laboratory that will serve chemistry, biology, and general science classes for groups of 24 students. The room has windows along one long wall, a fume hood positioned in one corner, and a single entrance door on the opposite short wall. The layout design process begins not with table placement but with safety zone mapping. The area within 1000 millimeters of the fume hood, the eyewash station, and the fire extinguisher is designated as clearance zones where no lab table may be placed. The primary circulation path from every workstation to the exit door is traced, and no table is positioned to intersect this path. With safety zones established, six island configuration lab tables are positioned in two rows of three, each table measuring 1200 by 600 millimeters and accommodating four students. The 1200 millimeter aisle between rows meets the minimum clearance for back to back workstations. A peninsula configuration table is placed near the window wall for microscopy work, using natural light to supplement task lighting. Two floor mounted lab tables adjacent to the fume hood are specified with aluminum alloy frames and 12.7 millimeter physico chemical board surfaces for advanced chemistry experiments, while the remaining tables use standard cold rolled steel frames with epoxy coating for general science use. The teacher demonstration bench is positioned with clear sightlines to all six island tables, ensuring no student workstation falls within a supervision blind spot. The final layout accommodates 24 students with all safety clearances met, all emergency equipment accessible within ten seconds from any workstation, and defined storage zones that separate general glassware from the chemical storage integrated into the fume hood adjacent tables.
Table of Contents
- Why Lab Table Placement Determines Laboratory Safety
- Choosing Between Fixed and Mobile Lab Table Configurations
- Clearance Spacing and Traffic Flow Dimensions
- Layout Typologies Island Peninsula and Wall Mounted Arrangements
- Integrating Safety Equipment and Storage into the Lab Table Layout
- Practical Design Scenario Applying Layout Principles to a Multi Use Science Laboratory